Adding/Deleting a Group
Enhance user management with custom groups:
Create role-specific groups (e.g., Sales group for representatives)
Delete unnecessary custom groups
Note: Built-in groups cannot be deleted
Adding a New Group
To add a new group:
Click Add Group at the top left of the window.

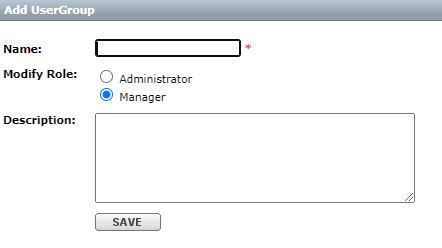
The Add User Group screen opens.

Enter the Name of the group you want to create.
Next, select which role will be allowed to modify the group in the future.
If Modify Role is set to Manager, users with the Manager and Administrator role will be able to modify contents and add/delete users in the group.
We recommend leaving the default as Manager-level privileges.
If Modify Role is set to Administrator, only users with the Administrator role will be able to modify contents and add/delete users in the group.
The Modify Role setting defines which level of role can edit the group, it has no impact on the roles of users who are members of the group.
User roles are assigned whenever the user is created by an Administrator.
To learn about the different user roles in Thru, please visit the section of this manual called Creating a New User
After you have selected which role can modify the group, enter a description of the group that will enable other users to easily differentiate it from other groups.
Deleting a Group
To delete a group, select the check box for the group you want to delete, and then click Delete.

Only user-created group’s can be deleted.
Built-in groups that are created by the system cannot be deleted and will show an error message when attempting to delete them.
