Thru Retention Policy Change Management Best Practice
We often get the question
“I want to change my retention policies but first want to know how many files will get tagged for removal”.
This page describes a process for safely changing and testing policies.
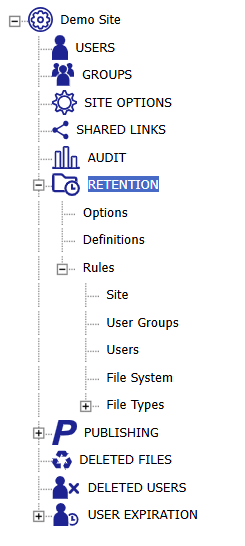
First, go to RETENTION in the Administration portal.
We need to turn off the automated deletion of files for all the rules so we can run our tests in a “safe mode”
To do this modify the Site retention Options and enable Block file deletion for all rules and click SAVE
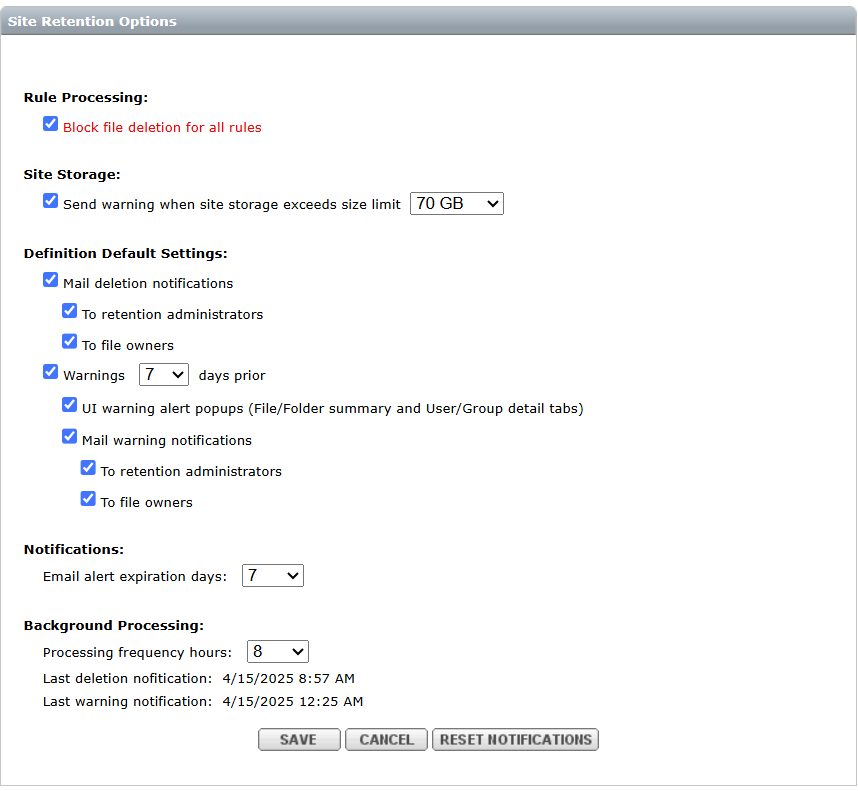
Make sure that the Definition Default Settings are set to send all notifications to the retention administrators.
Note: Retention administrators are users added to the RETENTION ADMINISTRATORS group.
Create a definition with the new retention policy that you want are considering.
For example, you might create a 30 day fixed period policy.
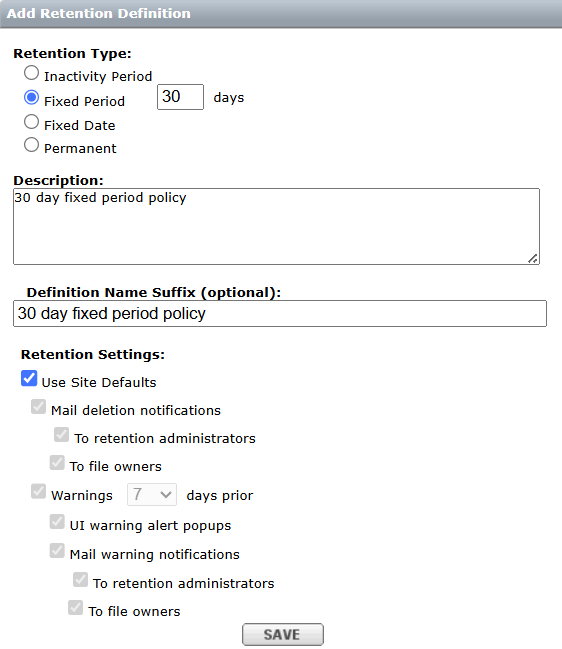
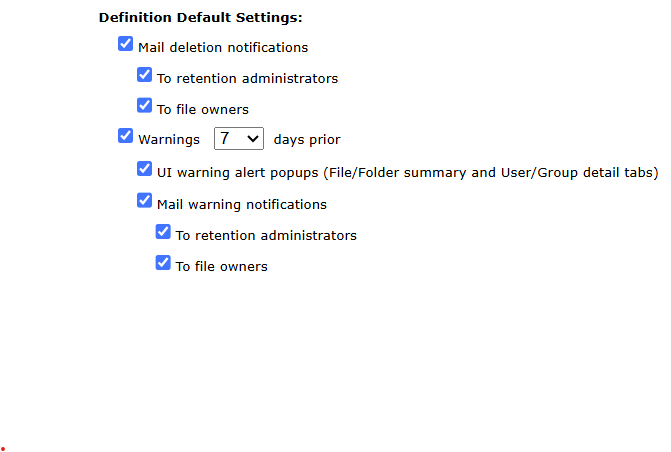
We will use the site defaults for the notifications.
Select the new definition in a rule that you want to change.
In this example, we are going to change the site-wide rule from 90 days retention to the new 30-day retention definition we created.
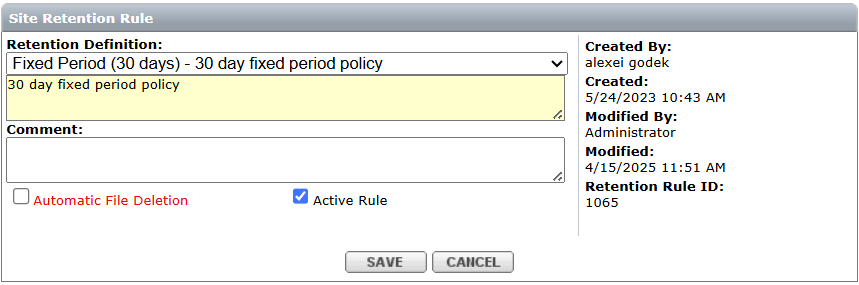
You will notice that Automatic File Deletion will not be checked. If you don’t have the Block File Deletion For All Rules selected, this option will also protect data from being deleted in the event that you want to isolate your testing to one rule.
However, to be extra cautious we suggest protecting the entire site against data removal during changes.
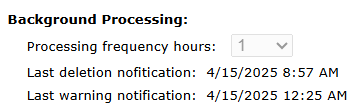
Once these changes are completed, we will wait for the retention rule to run.
Since we set the frequency to 1 hour, you should expect the results in approximately 1 hour.
The system will send an email to all the retention administrators. Make sure that you can receive emails from no-reply-notification@thruinc.com

This email reports that the retention system will delete 1,032 files from the site.
You can access the report in Alerts by clicking the link in the email.
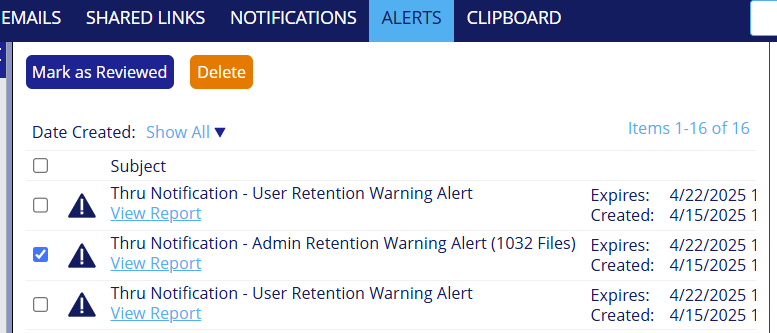
View Report will display a detailed report.
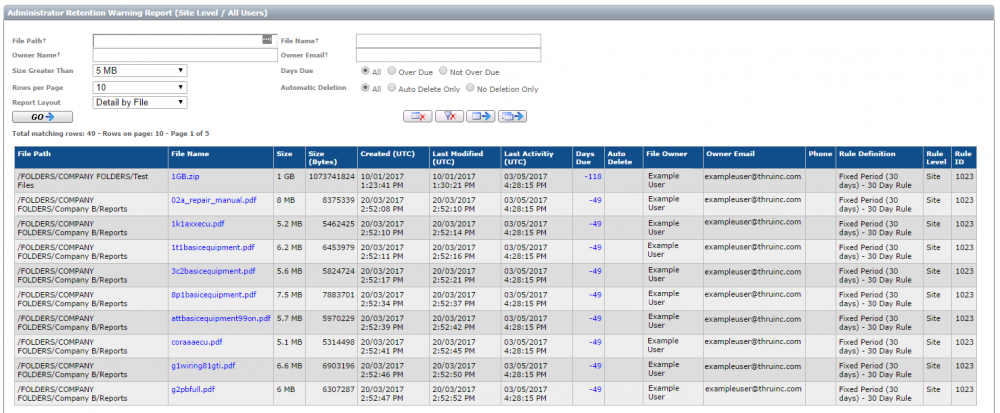
From here several filtering options are available to narrow down the list by focusing for example, on file size, files that are overdue, or file path.
The report can be exported to excel where you can add additional summary fields to total the number of bytes in the report.