Flow Endpoint Editor - Target - File Share
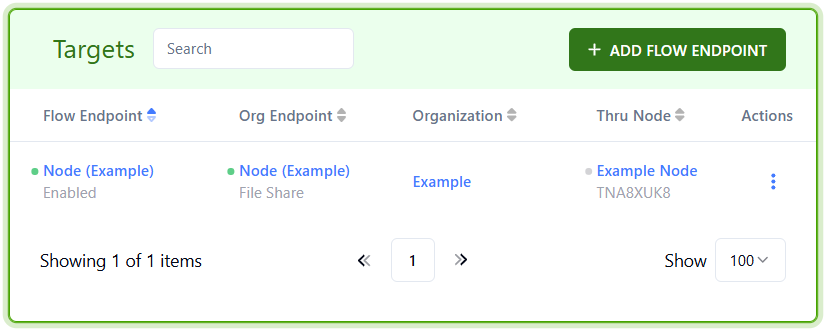
In Flow Studio, you will encounter two containers: Source and Target. To proceed, click the Actions icon located next to your File Share endpoint within the green Targets box on the right side of the page. From the dropdown menu, select Edit Flow Endpoint Settings.
1. In the Configuration tab, enter a Flow Endpoint Name *.

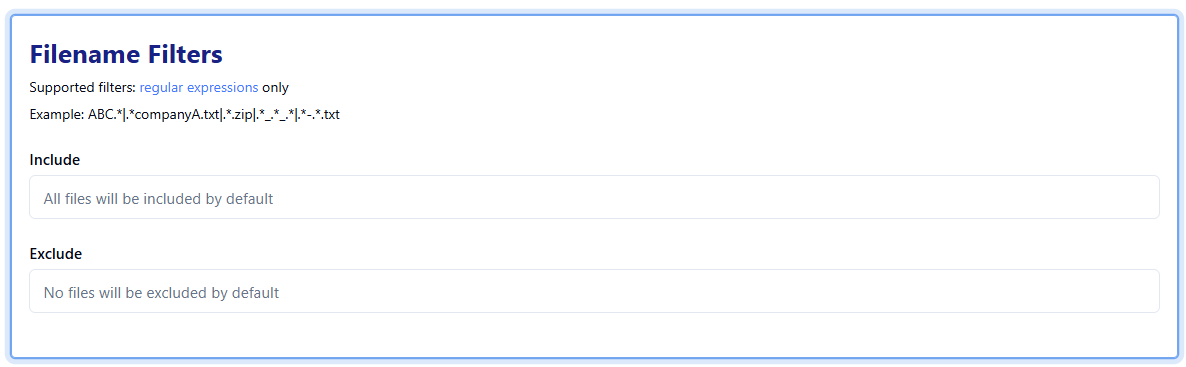
2. If you want, configure Filename Filters by specifying if files should be Include(d) and/or Exclude(d) from the pull. You can only use Regular Expressions here.
Choose whether to Overwrite existing files.
If enabled :

If disabled :

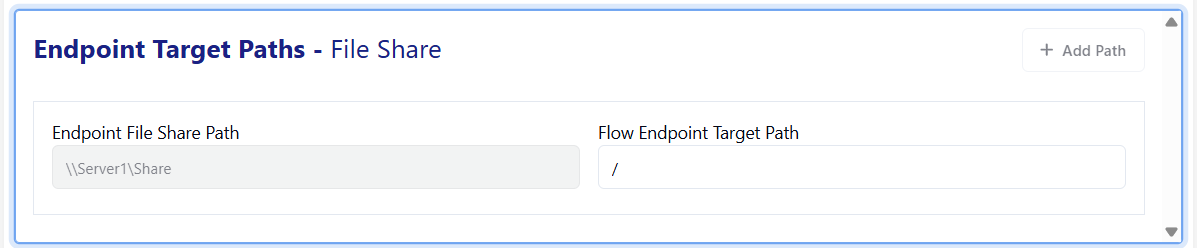
Enter the Endpoint Target Path.
5. In the Note field, add notes to help you keep track of your endpoint and settings.
6. Click the Save button to save the changes and go back to Flow Studio.
Click the Actions icon next to your File Share endpoint. Select Edit Flow Endpoint Settings. Click the Schedule tab.
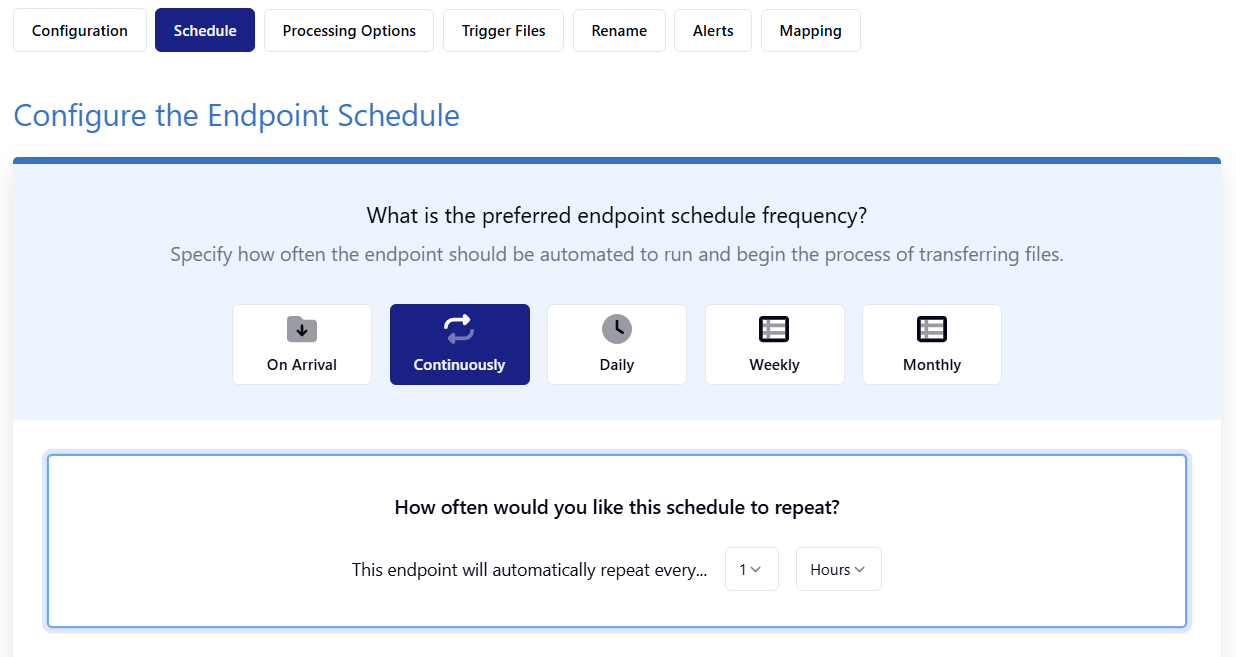
Scheduling lets you choose the frequency with which data and files are picked up and dropped off. The scheduling options include On Arrival, Continuously, Daily, Weekly and Monthly, with custom features for each.
Only external endpoints can be scheduled in the Flow Endpoint Editor. Setting up scheduling is required for both source and target endpoints.
To set up scheduling for a target endpoint:
1. Click Schedule.
2. Select one of the following schedules: On Arrival, Continuously, Daily, Weekly or Monthly.
3. Each option has a configuration box below each button.
a. On Arrival – Deliver files immediately after they arrive from a source endpoint.
b. Continuously - Set MFT to look for files every minute, hour, and day.
c. Daily - Select a day or days of the week: Sun, Mon, Tue, Wed, Thur, Fri or Sat. Select Start/End Time/Date and repeat frequency counter / Minutes Hours Days.
d. Weekly - Select a specific day from the Day of Week drop-down. Select Start/End Time/Date and repeat frequency counter / Minutes Hours Days.
e. Monthly - Select a specific day of the month in the Day of Month drop-down. Select Start/End Time/Date and repeat frequency counter / Minutes Hours Days.
4. Click the Save button to save the changes and go back to Flow Studio.
If you set your schedule incorrectly, undo it by clicking the green Remove Schedule Configuration button in the top right.
Click the Actions icon next to your File Share endpoint. Select Edit Flow Endpoint Settings. Click the Processing Options tab.
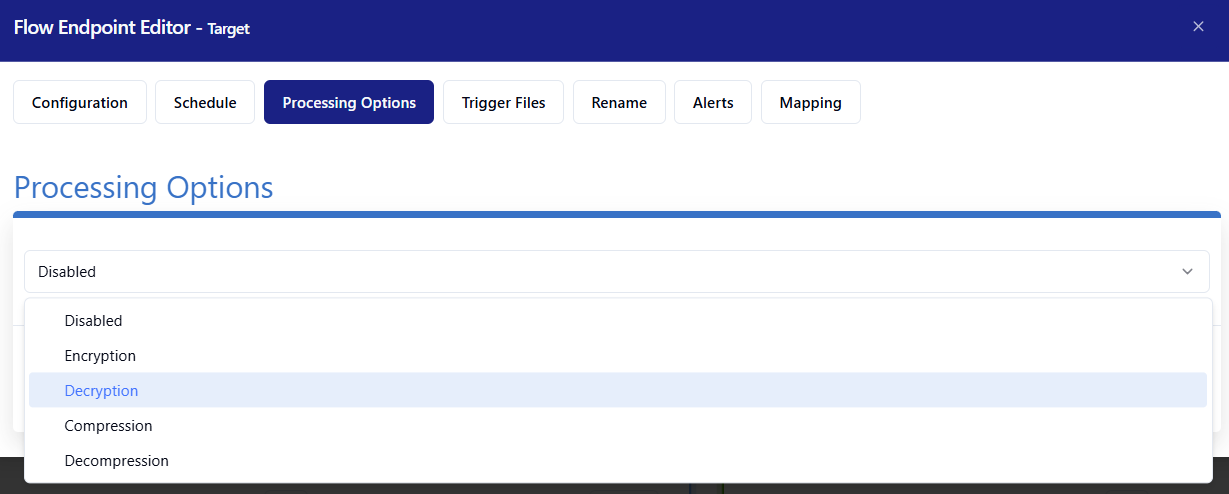
Here, you can choose to encrypt/decrypt or compress/decompress files. Please note that only one option can be enabled at a time.
To encrypt or decrypt files with PGP:
1. Toggle Encryption or Decryption on.
2. Select a PGP key to use.
All your organization’s PGP keys will be listed here. If a PGP key is missing or no keys are listed, go back to the Organizations – PGP Keys section and add a PGP key.
3. Click Use Selected.
4. Click the Save button to save the changes and go back to Flow Studio.
To compress or decompress files:
1. Toggle Compression or Decompression on.
2. In the Select a Compression Type box, click the Select a Compression Type drop-down and select your compression type: Zip or Zip7.
3. Under the field Archive Password (Optional), you can set a password. Use the eye icon to check your password.
4. Click the Save button to save the changes and go back to Flow Studio.
Click the Actions icon next to your File Share endpoint. Select Edit Flow Endpoint Settings. Click the Trigger Files tab.
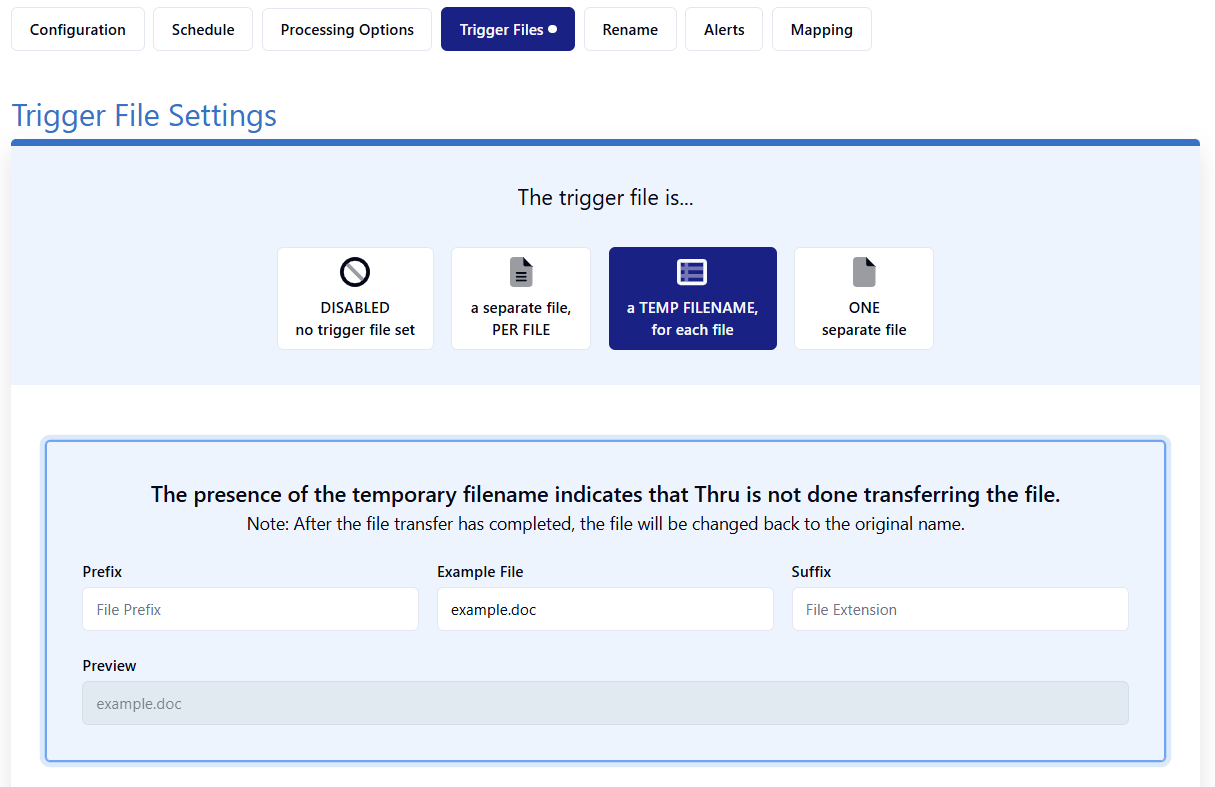
Trigger files can prevent partial files or trigger source or target applications or systems to process files. Thru supports 3 trigger file configurations to cover numerous use cases.
The trigger file options are:
1. Set up one trigger file per file.
2. Rename the trigger files after the transfer is completed.
3. One trigger file for a batch of files.
By default, trigger files are disabled, meaning no trigger file settings exist.
These steps will help you complete trigger file setup.
A separate file, PER FILE
Specify a file prefix and or extension to trigger a pull or keep a pull from occurring.
How does it work? Here’s an example: Where files are being hosted, the files can be instantly renamed with a script to indicate a new prefix and/or extension. Once detected by your configured endpoint, each file will be downloaded if it meets the required criteria specified in the configuration.
Another option is to set up the configuration to NOT download specific file prefixes and/or extensions because they aren’t ready to be transferred. Your configured endpoint will download all the other files instead.
Please skip this configuration if you are going to use ONE separate file.
1. Click a separate file, PER FILE.
2. Select the Add .ext or Replace .ext button.
Add .ext as a generic file extension or replace and add a custom extension name to your files.
3. Enter a File Prefix and/or a File Extension. You can use either or both options.
4. Click the Save button to save the changes and go back to Flow Studio.
A TEMP FILENAME for each File
Each file can be given a temporary name to indicate that the file isn’t ready to be transferred.
When Thru sees the temporary filename that you specify, it won’t pull the files.
You must rename them in your system to trigger the source endpoint to pull them.
Your configured endpoint will download all the other files. Additional rename settings allow you to rename those files with a new file prefix or file extension or remove them.
1. Click a TEMP FILENAME, for each file.
2. In the File Prefix field enter file prefix and/or enter the file extension in the File Extension field.
3. Click the Save button to save the changes and go back to Flow Studio.
ONE separate file
This configuration looks for a Batch Trigger File Name to start transferring all the files in the file path. You need to specify the name of the batch file that will trigger the file transfer.
1. Click ONE separate file.
2. Enter a batch trigger file name in the Batch Trigger File Name field.
3. Click the Save button to save the changes and go back to Flow Studio.
Click the Actions icon next to your File Share endpoint. Select Edit Flow Endpoint Settings. Click the Rename tab.
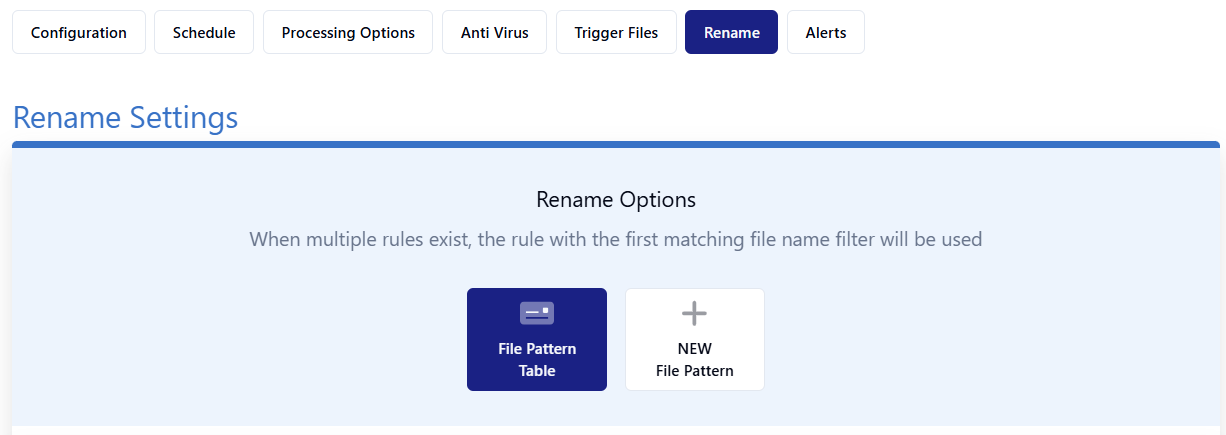
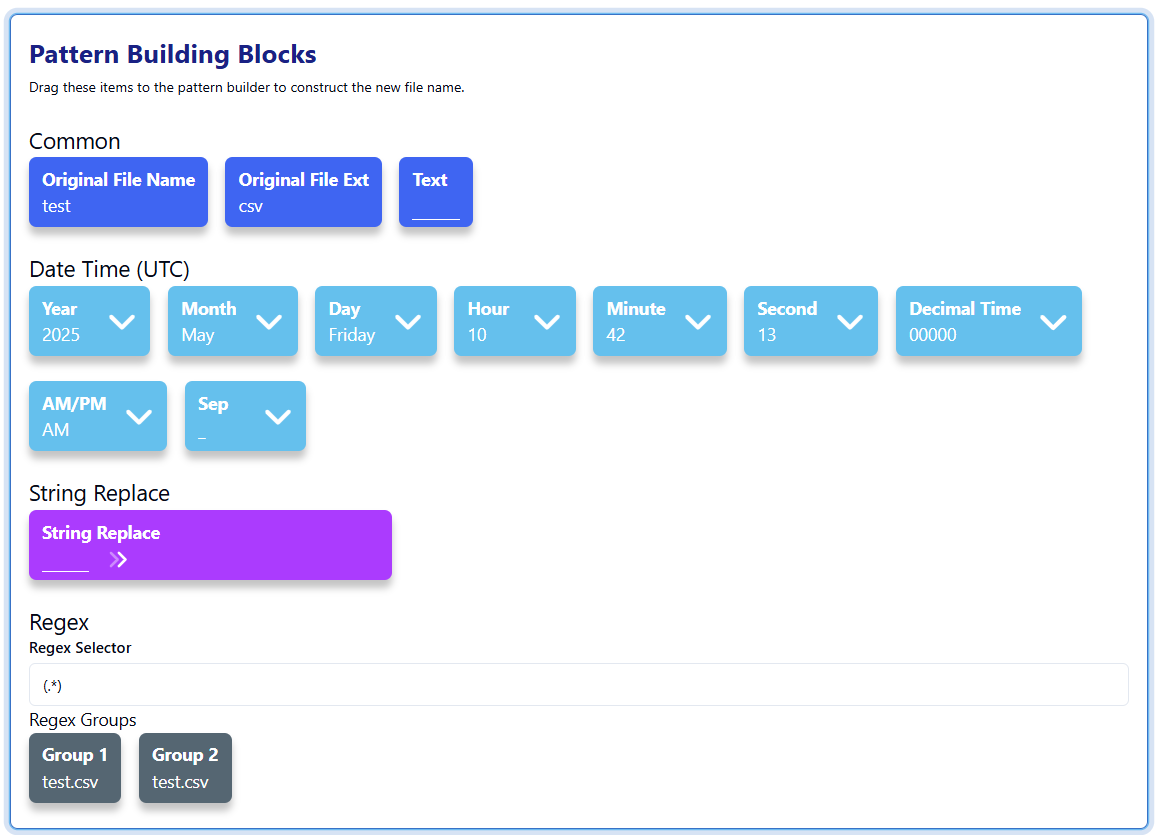
Renaming is great to use if you have many similar files going to the same Organizational Endpoint. You can easily add a timestamp to the file as well.
Multiple File Rename Patterns can be created and processed per endpoint.
To set up a new file pattern:
1. Click NEW File Pattern.
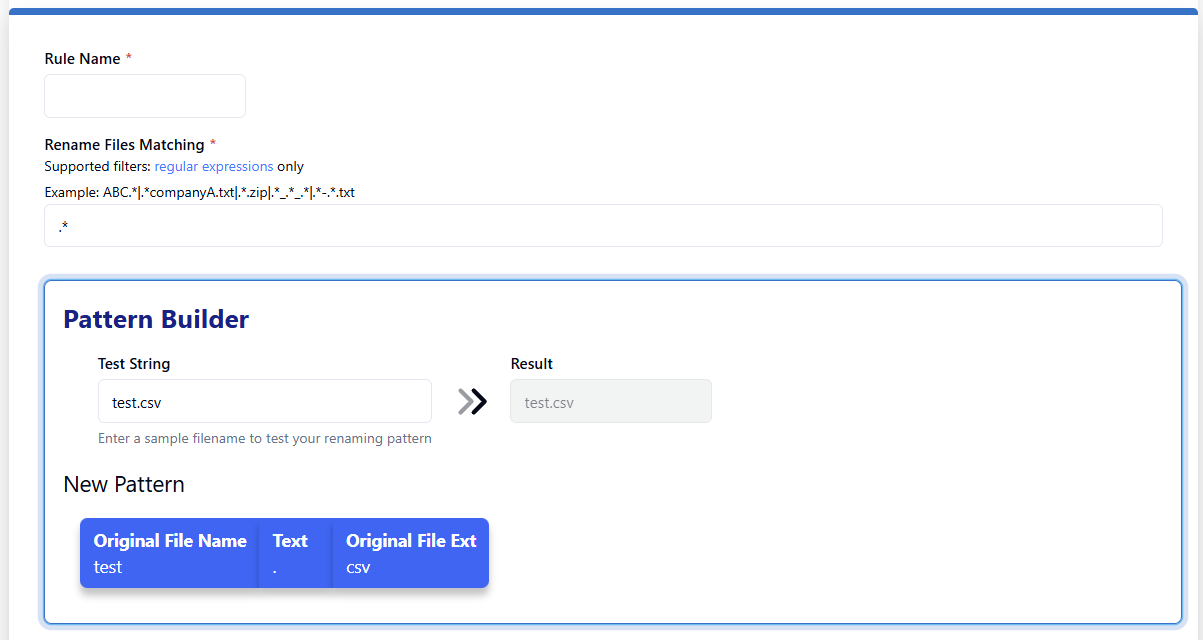
2. Enter a unique Rule Name *.
3. Enter a value to filter or enter .* to allow all files in the Rename Files Matching * field.
4. Enter a Test String, which is the text you want to replace.
5. In the New Pattern field, drag and drop common rename building blocks to create a rename structure. The Result field will show what the new file would be.
6. Click the Apply on paths block to activate renaming on that path. Some endpoint types support multiple source or target paths.
7. Click the Save button to save the changes and go back to Flow Studio.
Regex Selector Example
The incoming Test String is being filtered by the Regex Selector to pull out the word public.
Click the Actions icon next to your File Share endpoint. Select Edit Flow Endpoint Settings. Click the Alerts tab.
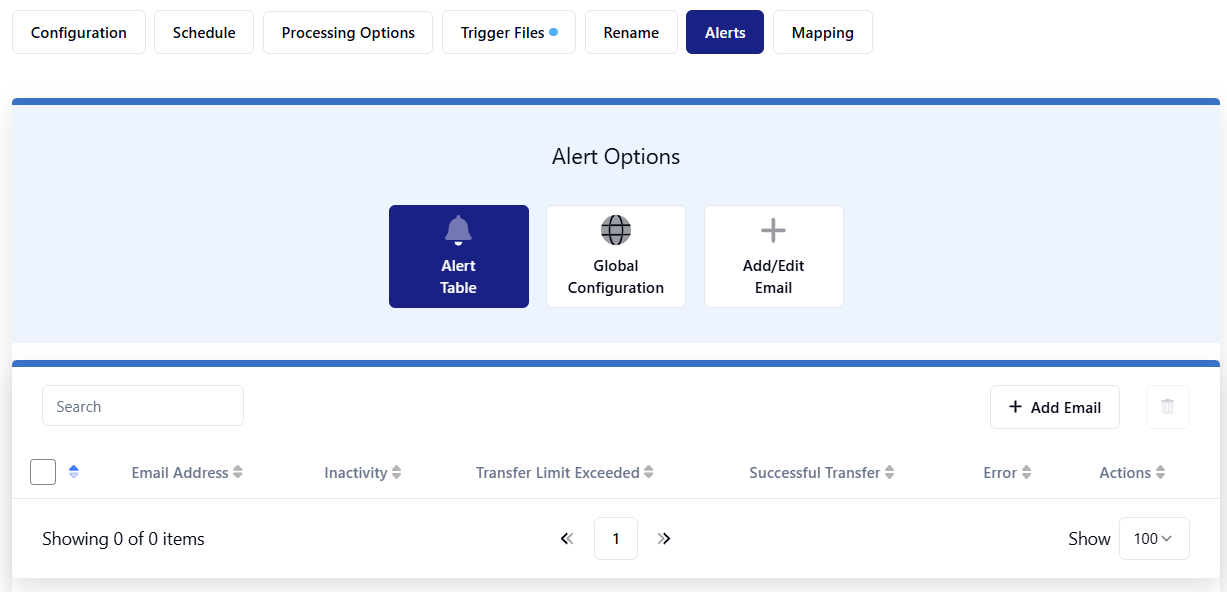
Use alerts to be notified of Transfer Inactivity, Transfer Limit Exceeded, Transfer Success or Transfer Error. Add an email address to receive alerts from the Add/Edit Email pane. Once enabled, added email addresses will start receiving emails for the selected notification types. There’s no limit on how many emails can be added to receive alerts for the endpoint.
Set global email alert configurations to send alerts to multiple email addresses about the same errors. After email addresses are added, they can be administered on the Alert Table.
Emailed alerts can also be viewed in the Alerts section.
The character limit per email is restricted to 200.
To set up email alerts:
1. Click Add/Edit Email.
2. Enter an email address in the Email * field.
3. Click the checkbox for what you’d like to be alerted about. Non-global confirmation options include the addition of Transfer Success and Transfer Error.
4. Click the Save button to save the changes and go back to Flow Studio.
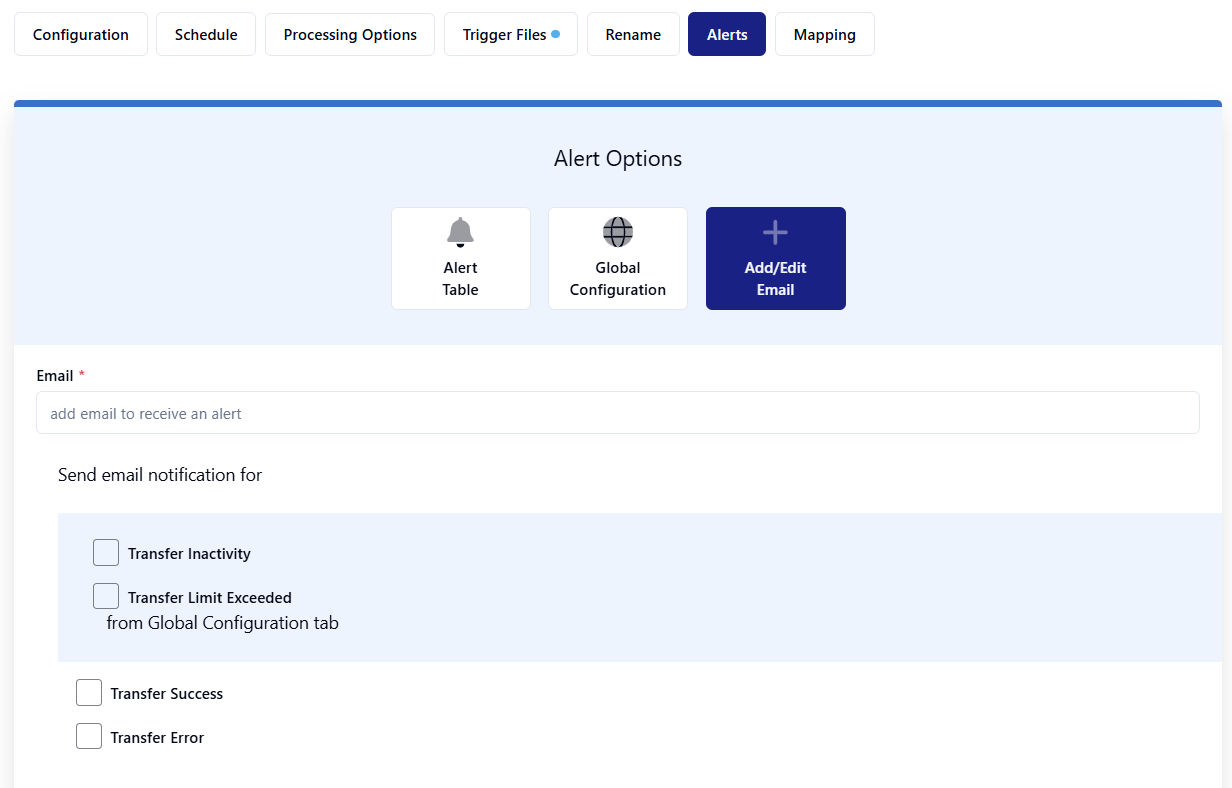
Global Configuration is applied to all email addresses within the Alert Table.
Transfer Inactivity defines the time period to trigger an alert if no file transfers have occurred.
Transfer Limit Exceeded triggers an alert if the defined number of files is exceeded with the set time period.
Transfer Success notifies you when files have been successfully transferred.
Transfer Error notifies you when files have failed to transfer.
Click the Actions icon next to your File Share endpoint. Select Edit Flow Endpoint Settings. Click the Mapping tab.

In Flow Studio, Target Mapping specifies which endpoints are connected. By default, all target endpoints receive files transferred from all source endpoints. Use mapping to deliver files to specific target endpoints when there are multiple target endpoints in one flow.
In one flow, you can create one-to-one, one-to-many, many-to-one and many-to-many endpoint connections.
To set up mapping:
1. Click the + Add Mapping button.
2. Enter the correct source endpoint, source path and target path to navigate files to the endpoint folder.
3. Click Save and go back to Flow Studio.
8. Click the light blue View and Push Changes button.